

This post is by Fictiv and originally appeared on their blog.
As a bunch of Nintendo nerds, we’re really excited about this week’s teardown, where we’re looking at the evolution of Nintendo controllers since the very beginning.
From the old-school NES controller with only 8 buttons to the game-changing N64 controller with the first joystick to the latest Wii U gamepad with a touch screen and a bajillion more features, we invite you to geek out with us as we explore the evolutions in both design and engineering across Nintendo’s product line.
Lets-a-go!
Original Nintendo Controller
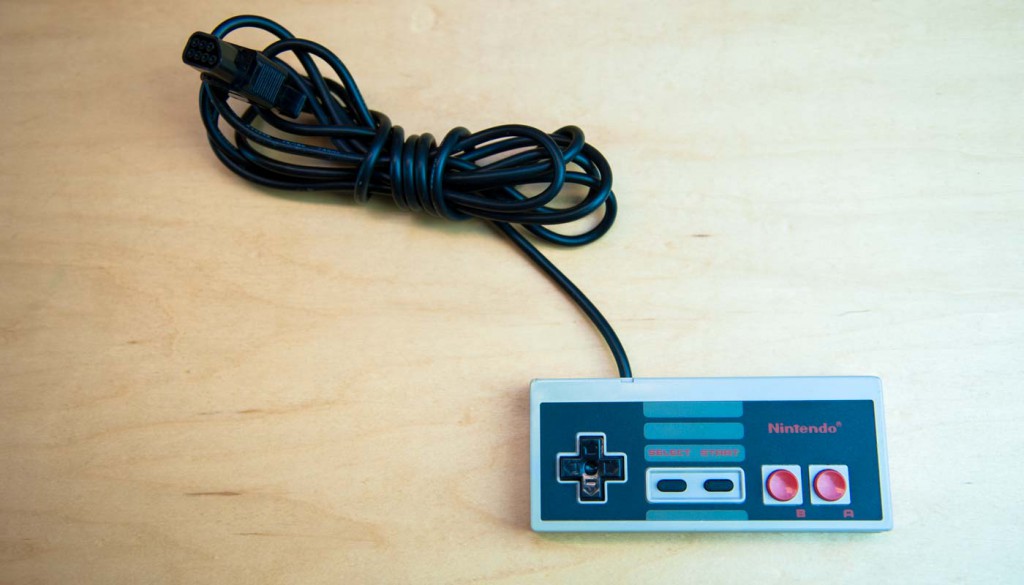
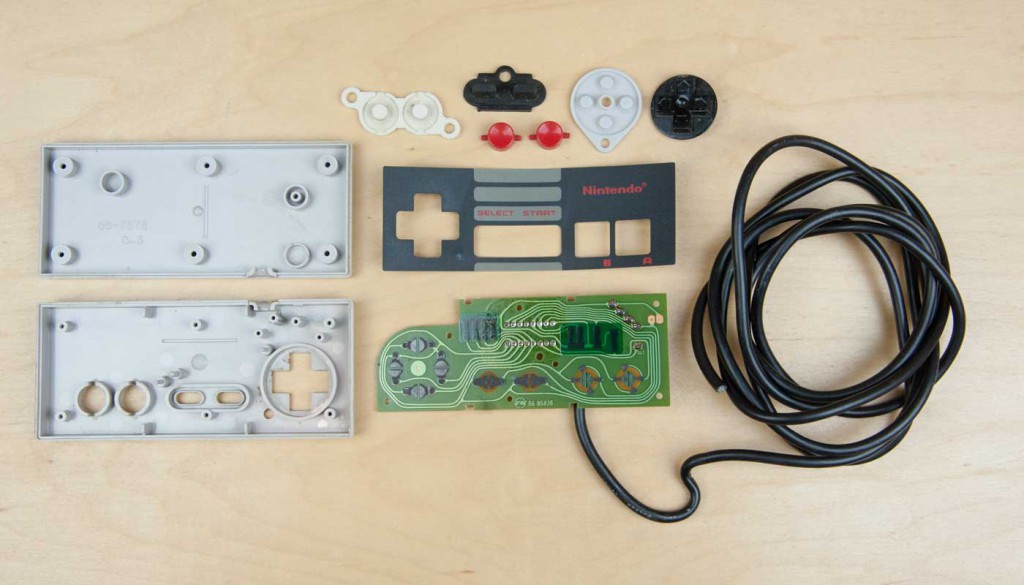
First up, the very first Nintendo Entertainment System (NES) controller, in all its boxy glory. It’s pretty simple: 8 buttons, 1 shift register, a simple PCB, and a simple injection molded plastic housing. No funny business here!
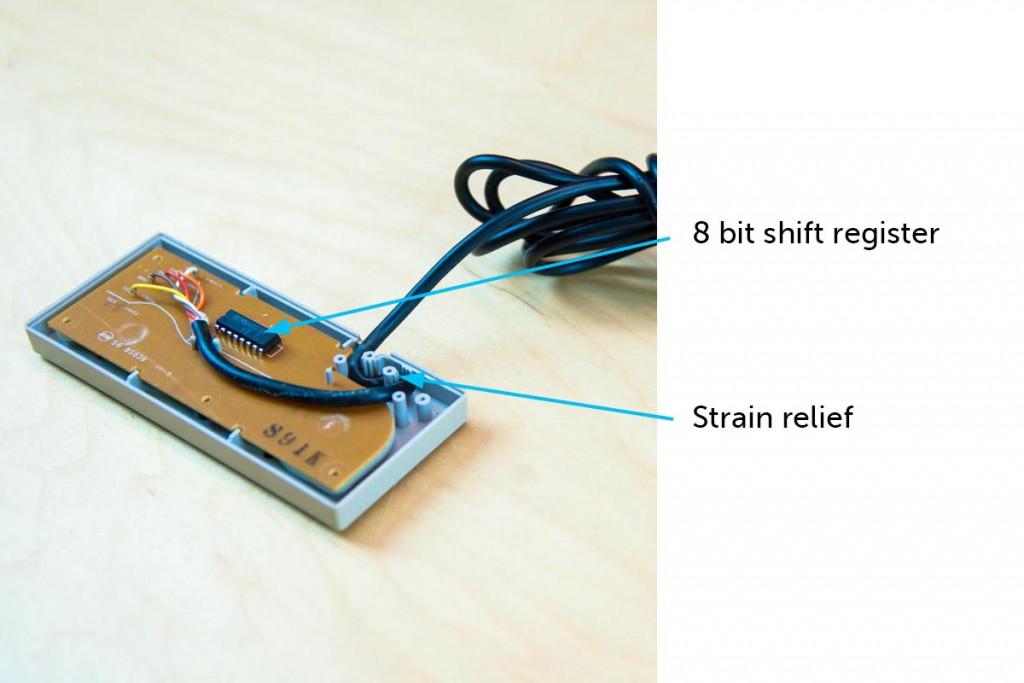
Above you can see the 8 bit shift register (props to 6502nerdface on Hacker News for sharing the 74LS165 datasheet as well as the ribbed bosses used for strain relief. You can imagine the cord gets a lot of applied force (kids yanking on it), so strain relief here is key.
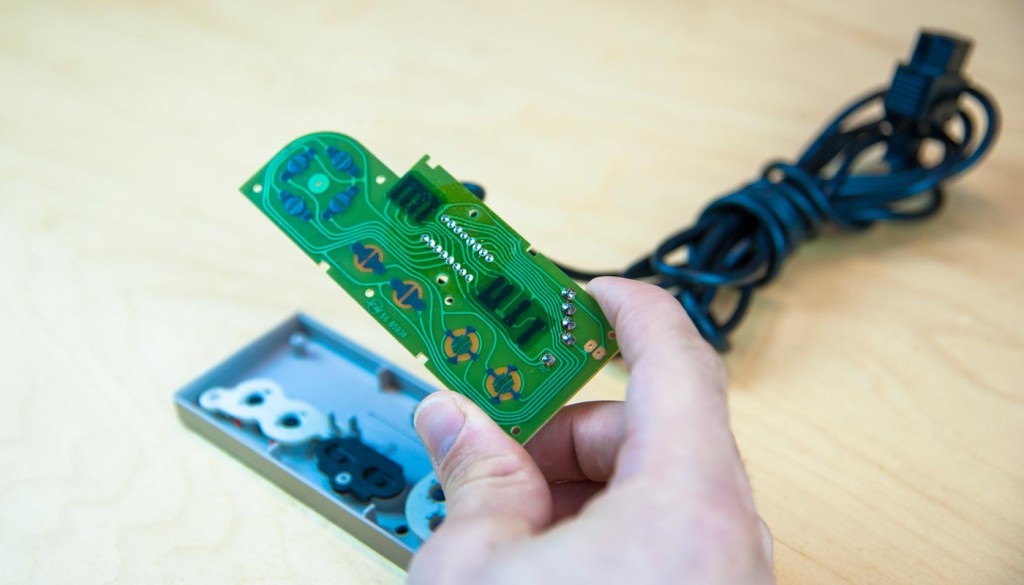
Here’s a look at the simple, bare PCB. It’s amazing how minimal this board is and how far electronics have come.
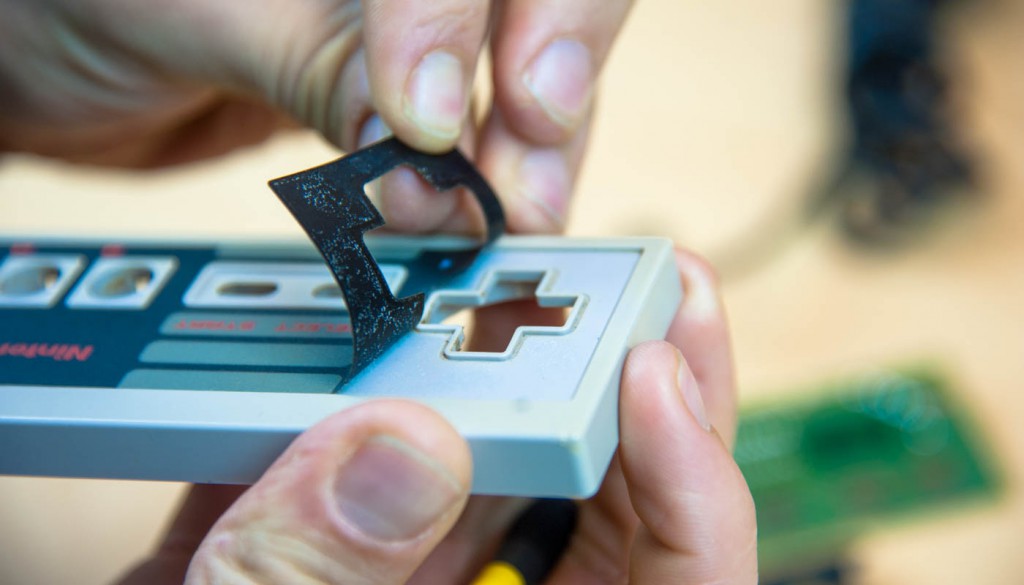
All the front design details are applied with a black vinyl-printed adhesive sticker. So simple!
Summary here is that the NES controller is a solid piece of engineering, but perhaps lacking the design swagger we expect from Nintendo today.
Super Nintendo Controller
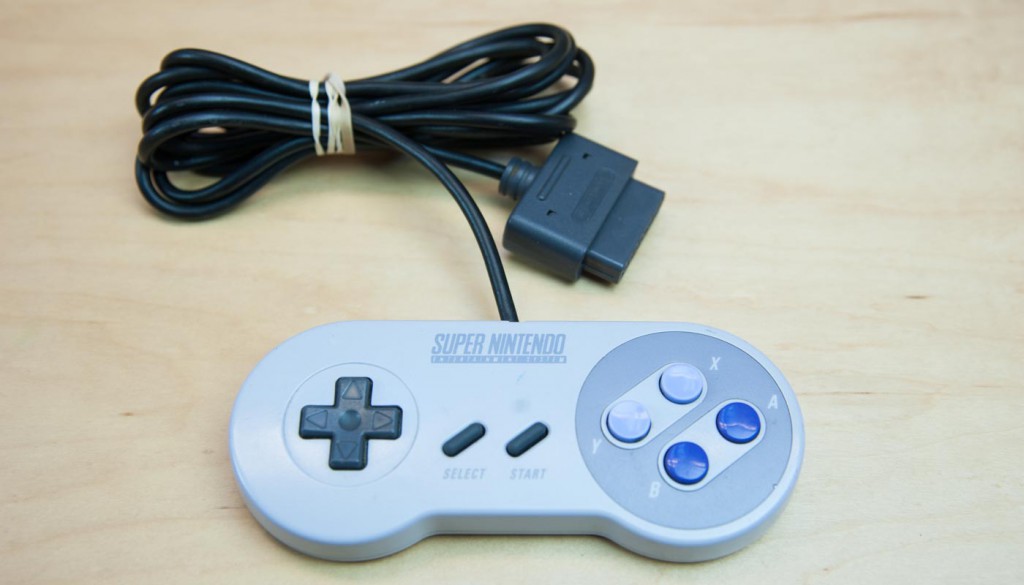
Next up, the Super Nintendo controller! After seeing some success with the NES, Nintendo really stepped up their design game with the second controller. We have 4 more buttons, a curved form and significantly more internal complexity.
One of the biggest mechanical changes we see here is the introduction of bumper mechanisms on top of the controller.
These bumper mechanisms are quite brilliant actually and made up of 3 parts:
- The plastic part you press
- The elastomer beneath, which is a rubber molded piece with a conductive bit undeath the plastic
- An interdigitated and exposed trace on the PCB
The benefit of this button design vs a standard push button is that it has a much longer life and it also gives a soft, yet very tactile button feel. Dome switches and push-button switches, on the other hand, won’t be able to take the abuse of serious gamers.
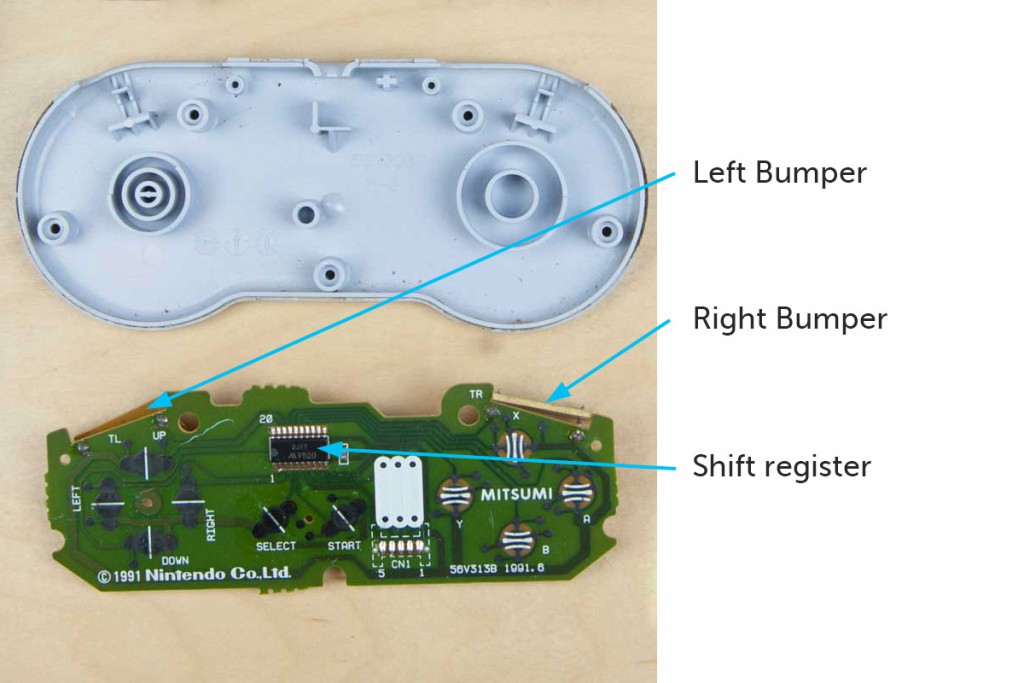
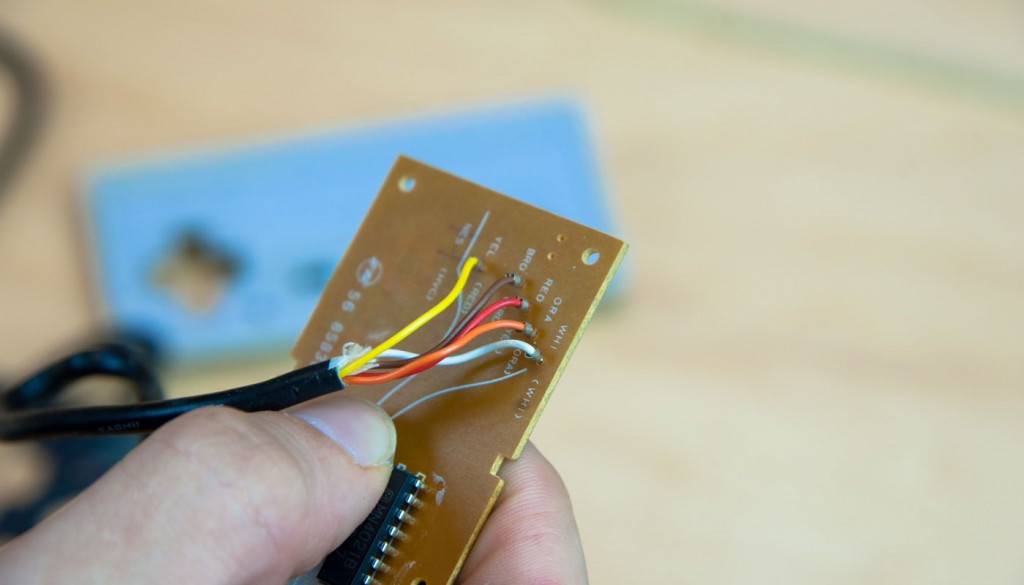
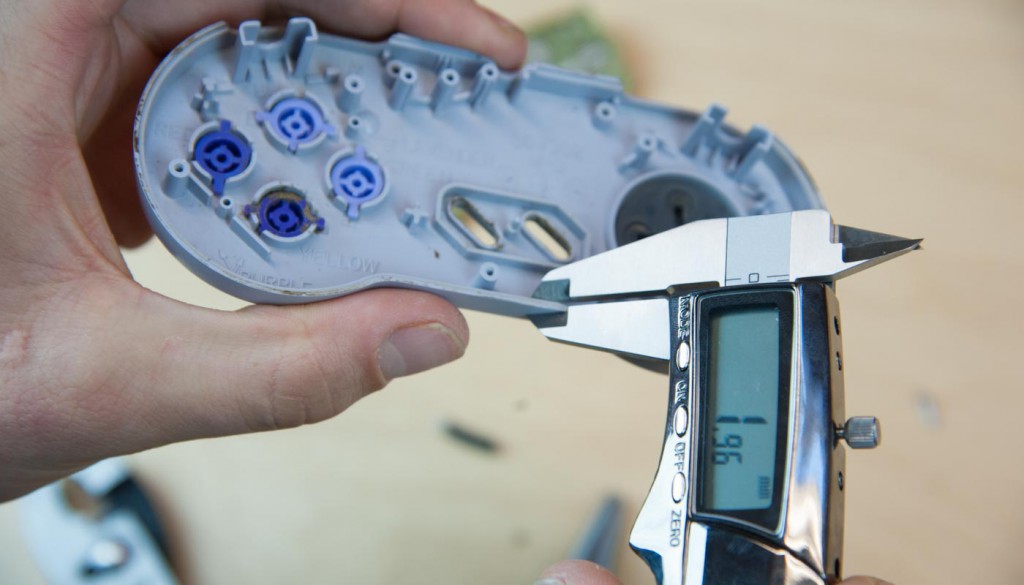
Taking a closer look at the circuit board, we find a shift register on the front, 10 buttons + the 2 bumpers. So 12 inputs total.
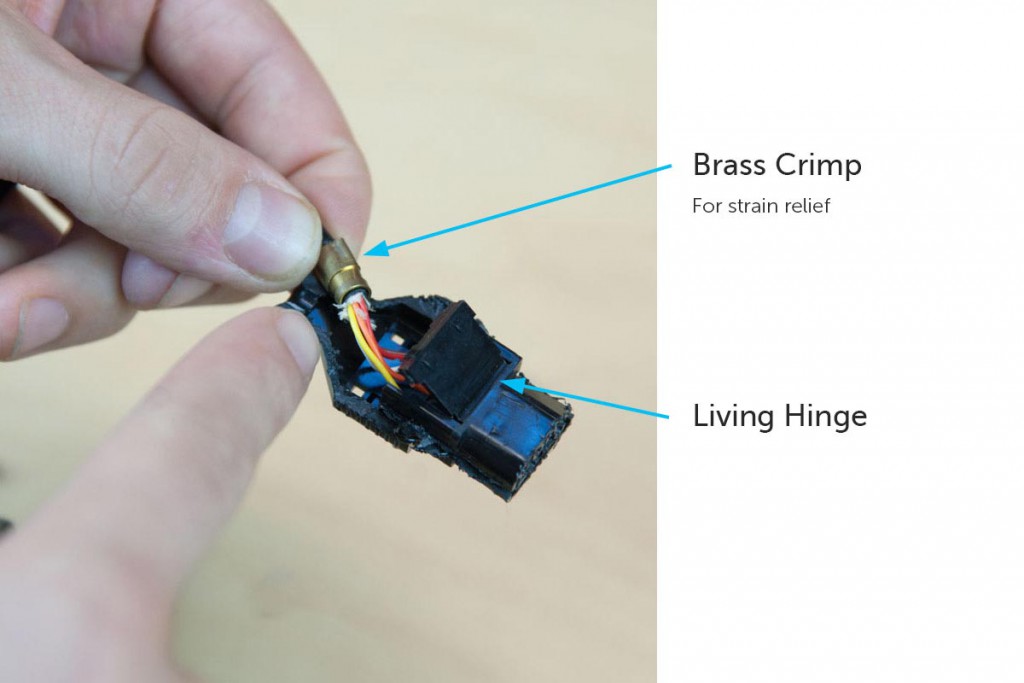
For strain relief on the connector they’ve used a brass crimp + there’s also a nice living hinge here. Usually living hinges are molded flat, but we can see the shut offs around the edge of this one, so it was actually molded at a 90 degree angle.
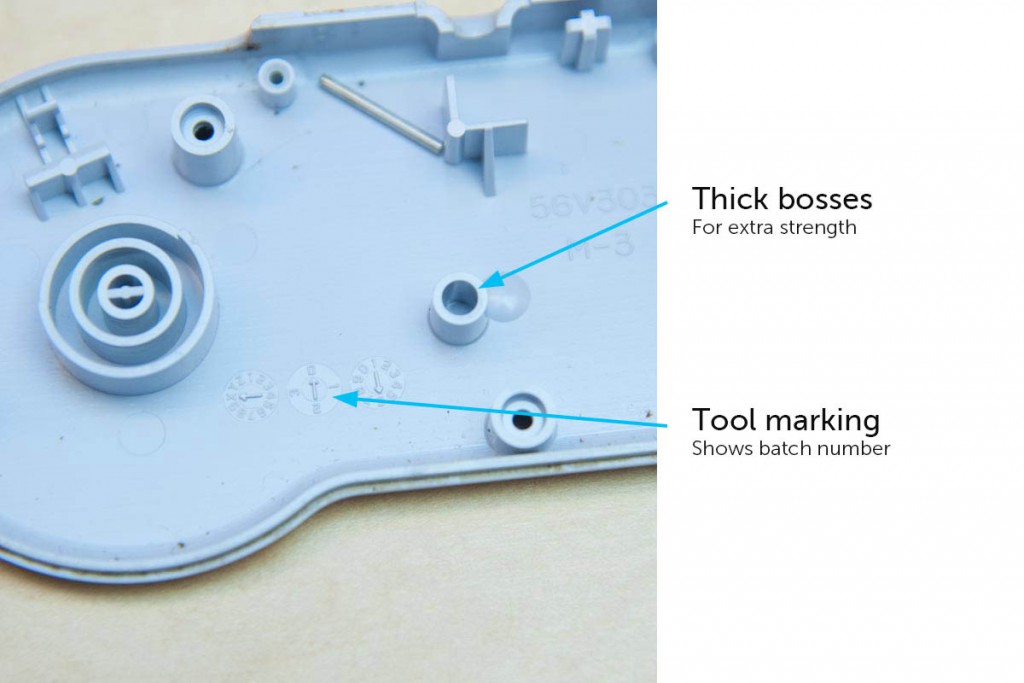
Taking a look at the plastic housing, we’re starting to see some tool markings now (none on the NES). If you look closely at the 3 circular markings above they show the batch number — this one looks like x-0-6. Not everyone uses this style of tool markings though; there are lots of different systems. Some are more “encrypted” and others are simpler. There’s no one way to do it!
We also notice how thick the ribs and bosses are here — just massive! Then we imagine an 8 year old kid throwing this thing at the wall and we’re like, “right.. that makes sense.”
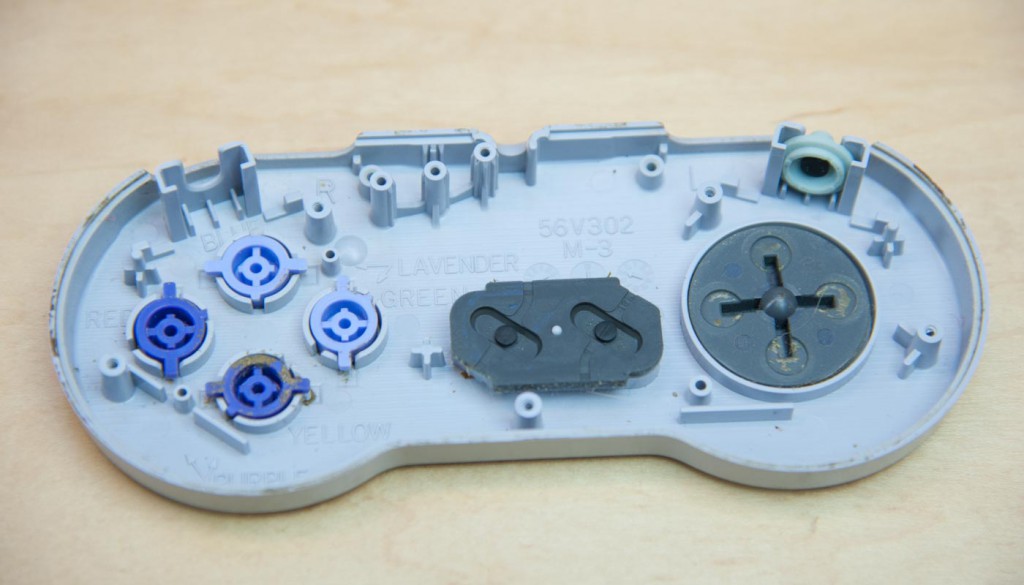
On the other half of the plastic casing we find some interesting color markings, used for installation purposes. Seems a bit excessive but hey, better to go overboard than get the assembly wrong.
Overall you can see a lot more complexity in the mold design here compared with the first controller. This is a 2 part mold, well designed with parting lines along the top and ejector pin marks everywhere (we counted 22!).
While there are significantly more components and improved design with the Super Nintendo controller, the electrical engineering is still super simple.
And then (descending on a fluffy Mario World cloud) came the N64 controller…
N64 Controller
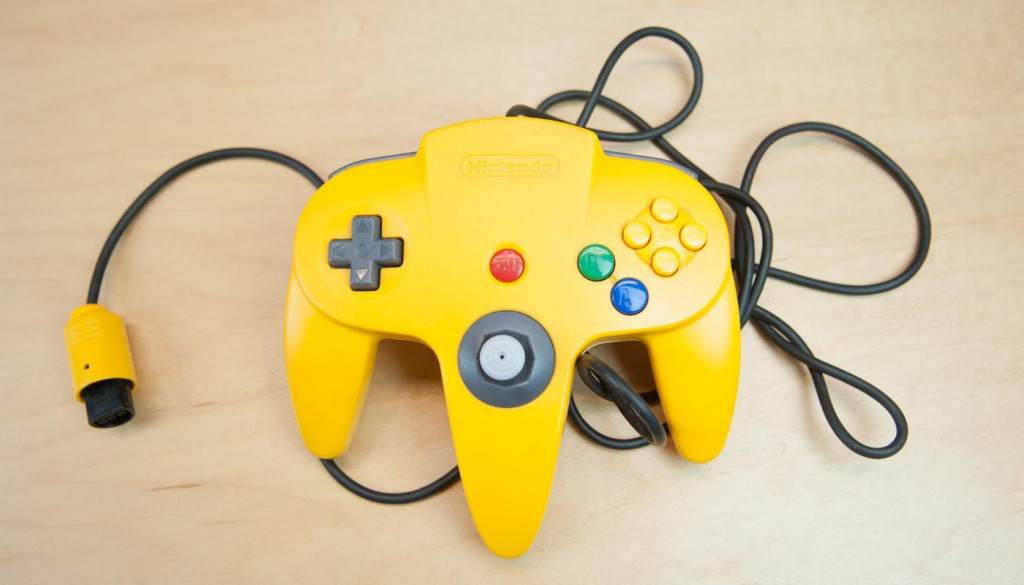
The glory controller! We have fond memories jammin’ away on this controller, blasting our Moonraker laser in 007 or defeating Ganon with the Master Sword in Zelda. Oh for simpler times…
This controller is so memorable because the ergonomics here are so vastly different and now we have 14 buttons and a joy stick. A joy stick! More on that later.
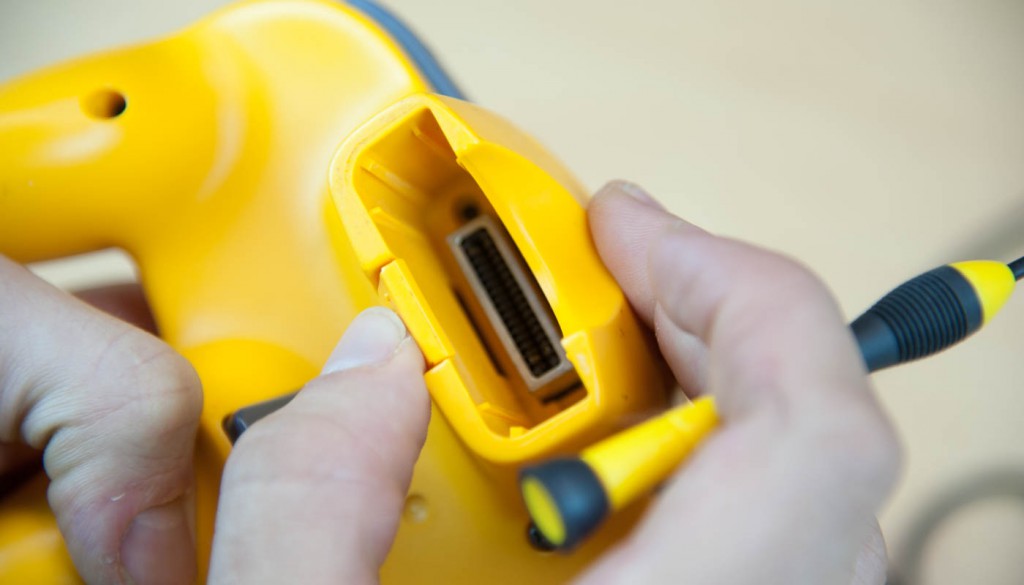
Here’s a shot of the clip that allows you to load the extension packs, which is another big change with the N64 controller. This spring-loaded button mechanism is pretty neat too.
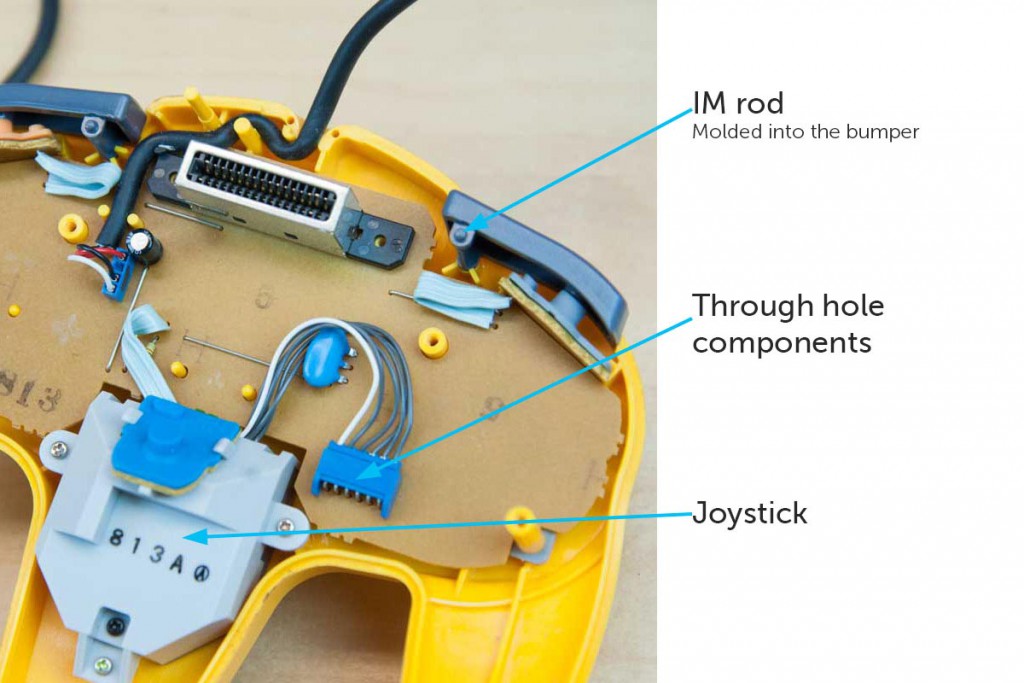
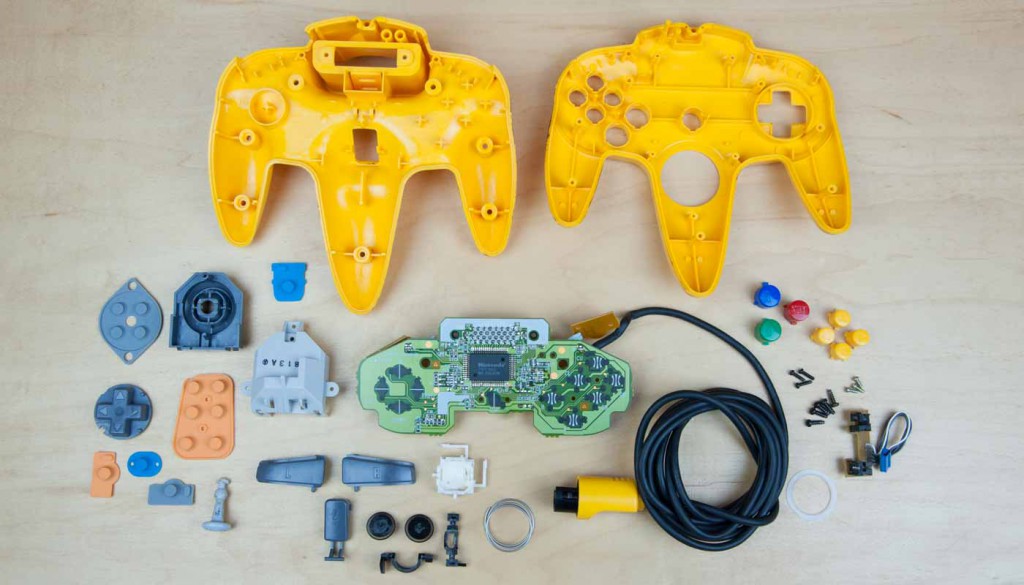
Taking a look inside we find the 2 bumper mechanisms on top (definitely upgraded since Super Nintendo), the PCB, some through hole components, and the back of the stand alone joystick.
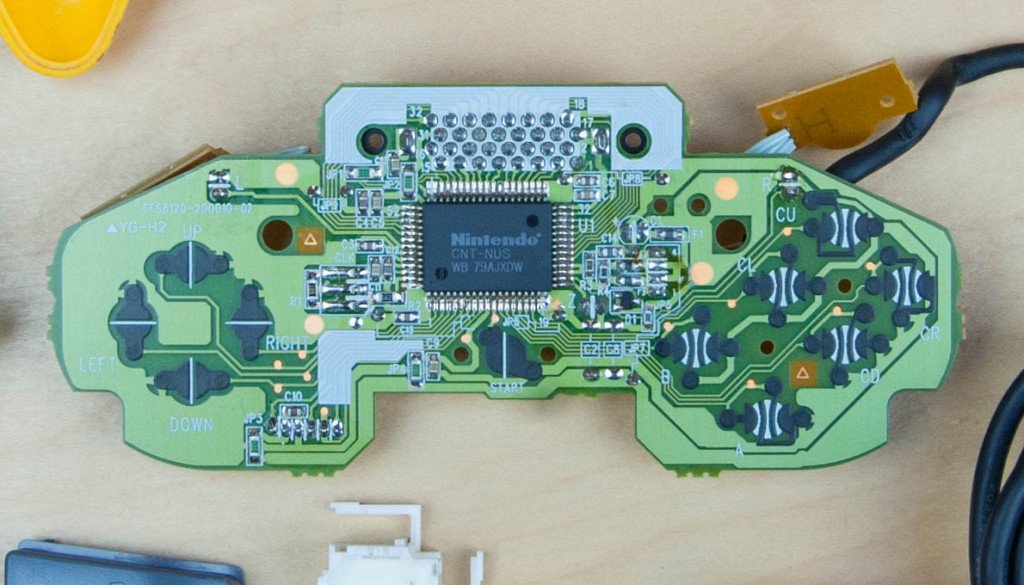
Taking a closer look at the PCB we see a lot more complexity compared with the previous controllers; this one has a lot more processing power to support a custom Nintendo chip, 14 buttons, and a joy stick.
Then last, but certainly not least, our favorite mechanism: the joystick!
This is its own specialized module which adds significant complexity to the mechanical design. The joystick itself is kept under tension from a single spring in the up/down axis, and then a single screw + 2 snaps fits hold everything together.
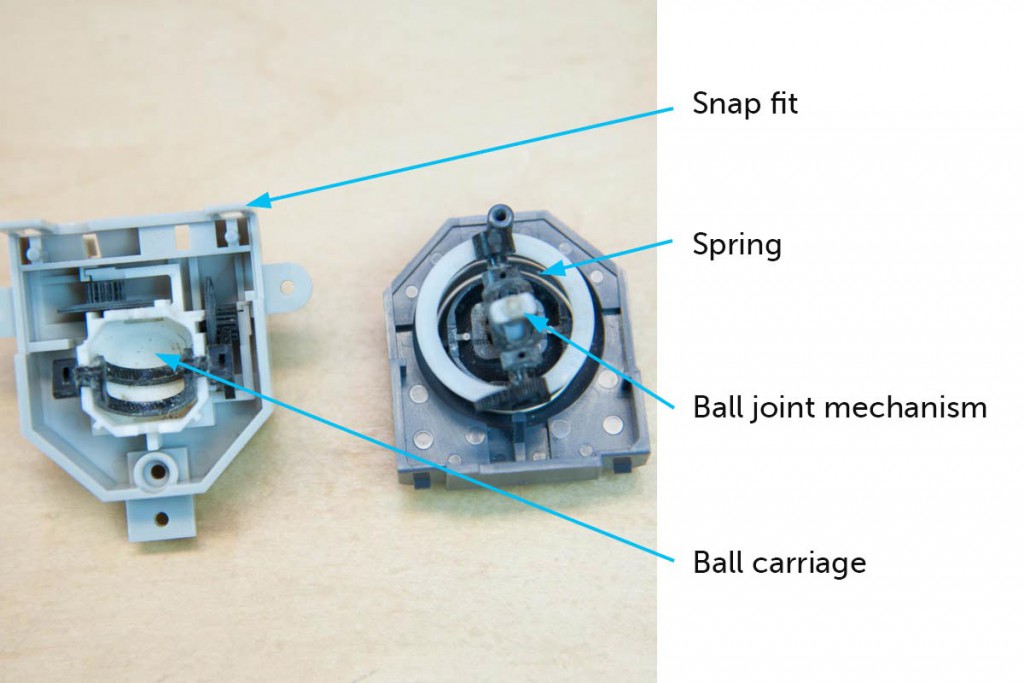
Above you can see some of the major components of this mechanism: the 2 snap fits, the spring, the ball joint mechanism, and then the ball carriage.
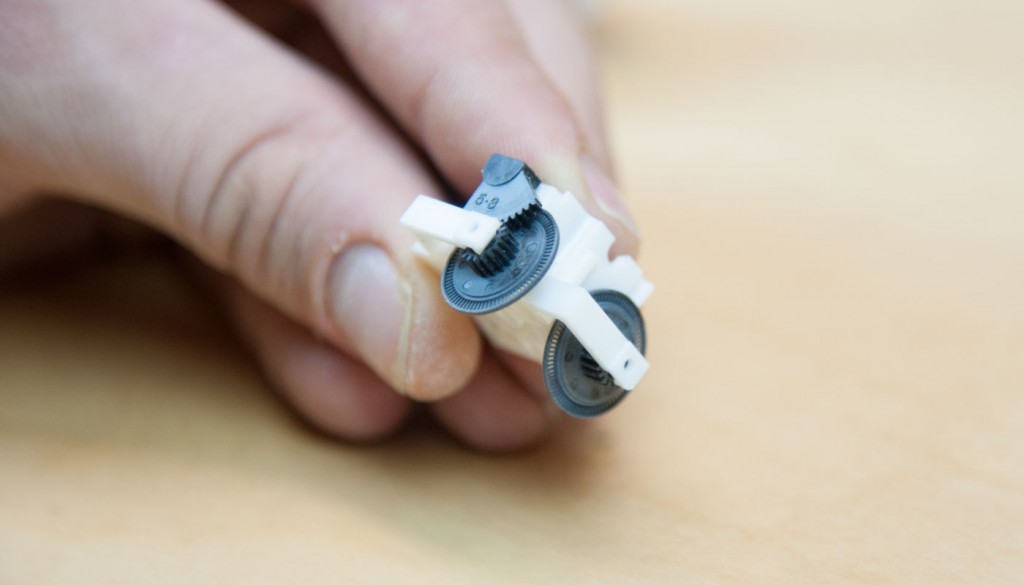
Here’s how this nifty mechanism works: The carriage sits on top and moves the black disk. Then as you move the joy stick up/down/left/right, there’s a sensor that measures the radial travel of the disk. The black wheels with the tiny cutouts indicate that the sensor is an optical encoder.

caption: left to right, top to bottom: sensors, ball carriage, spring platform, spring, bottom housing, carriage housing, joy stick, wheels, top housing
It may look simple, but these are very impressive and delicate injection molded parts. It’s amazing to think that this would have been a very expensive part to make in 1996, but today the resolution of our 3D printers is high enough that we can easily fabricate these tiny parts (each bar is just 0.05mm).
For more Nintendo design-goodness, check out Part 2 where we look at the Gamecube controller, the Wii mote, and lastly the Wii U gamepad. Interested in trying your hand at your own teardown? Check out Fictiv’s Interactive Teardown Workshop.